
Introduction
This is part of our series on design sprints . If you haven’t read our previous articles, I encourage you to read more about our design sprint process .
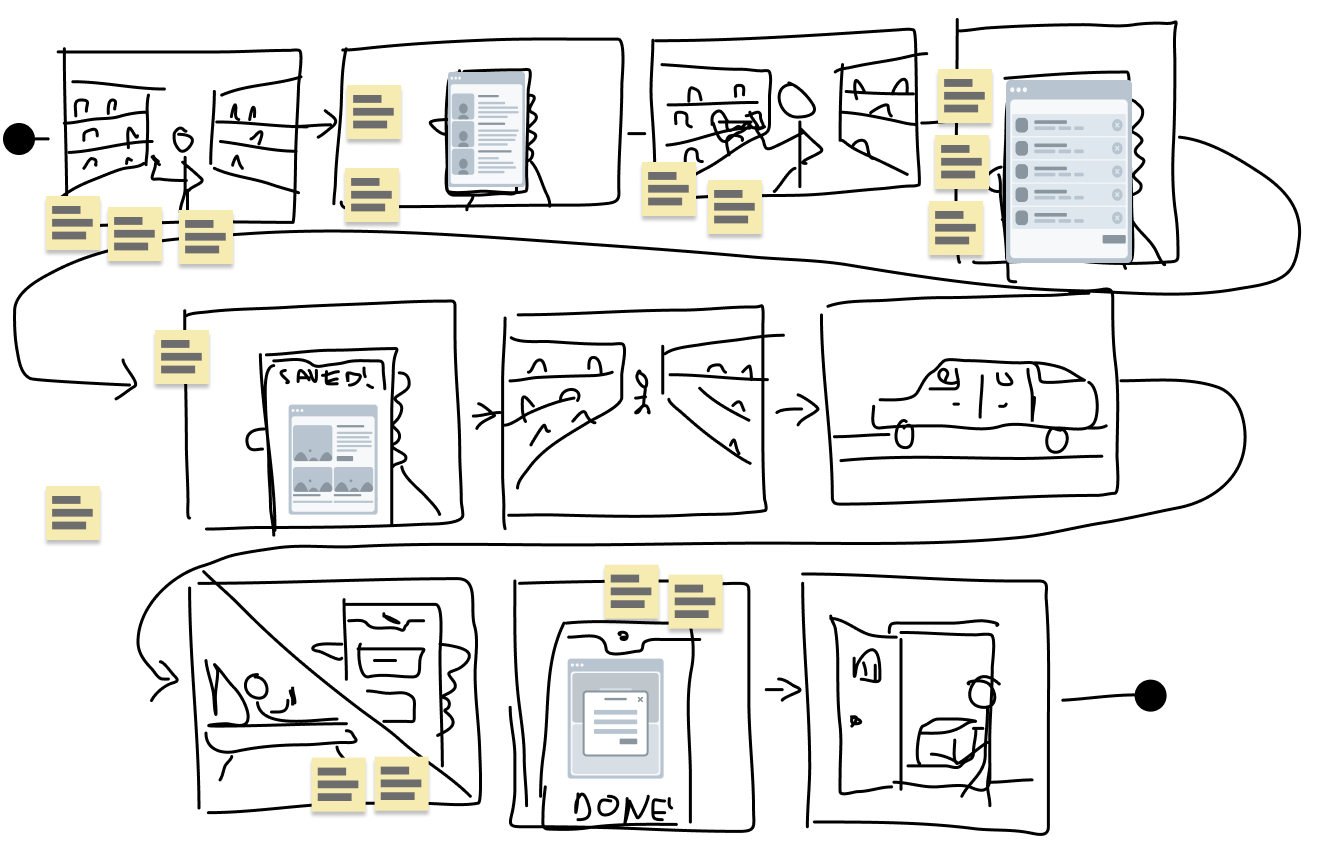
Day 4 is a little different from the other days of the Design Sprint . Instead of a series of workshops, we will spend most of the day each working on one part of the prototype.
Towards the end of the day, we will do a test run to check on our progress and adjust from there.
Design Sprint Day 4 - Prototype
How to start
Using the storyboard from Wednesday as our map, we will divide and conquer the prototype.
The team will be split into 5 roles:
- Makers
- Asset Collectors
- Writers
- Stitcher
- Interviewer
Makers
Makers will create the various sections of the prototype.
How many? 2 to 3 Makers.
Makers will split the storyboard (or storyboards!) into sections.
Each maker is responsible for creating the prototype for their sections of storyboard.
Asset Collectors
Asset Collectors will gather images/icons and other assets that the makers will need.
How many? 2-3 Asset Collectors.
The asset collectors will make sure that the makers have the assets they need to continue their work. This means finding images, icons, illustrations, sounds, or anything else that the maker can stay focused on and leave these decisions to someone else.
Writer
Writer to provide the text for all the parts of the prototype.
How many? 1 Writer.
The writer fine tunes all the copy from the storyboard and provides that copy to the makers.
This might include fake text for an article about whatever you’re prototyping, an email about the product, an advertisement etc, as well as the copy in the prototype.
Stitcher
The stitcher is responsible for taking the sections of the prototype or prototypes and attaching them together.
Their job it is to make sure that the whole experience makes sense from end to end.
How many? 1 Stitcher.
The stitcher puts it all together and makes sure that all the pieces fit together into a seamless prototype.
Interviewer
Interviewer, who will write the interview script for Friday.
How many? 1 Interviewer.
The interviewer will write questions for the interviews tomorrow based on the storyboard and the prototype.
But how will we build a prototype?
A prototype is a tool for research and discovery – not a functional app.
A good prototype feels real enough to pretty well replicate your desired experience and help your interviewees get in the headspace of the problem you’re asking them to think about.
The goal for THIS prototype is to make something that does those things AND can be ready to test after 8 hours of work.
The prototype is not a blueprint for a product. It’s a way to get feedback on an idea from people who might use a product like yours in the future, and then apply that feedback so that you have a really good idea of where to look next as you continue the process of making an idea into a service.
Recommended Tools
You don’t need any fancy design software to do this because this is intended to be accessible for everyone. You could lean on Keynote or Powerpoint.
I recommend these tools because they are basic, they are not designer-only, and because they are relatively easy to use. You can even use the transition features in both of them to show the flow of the prototype.
Stock Photos
You need images, you need text, you need to transition between scenarios and steps, and you need a way to set up your starting scenario. You can (and absolutely should) fake things if you need to.
Does there need to be an email? Fake it.
Does an automated phone call play into your scenario? Fake that, too.
The reason for this is to keep the prototype simple and to prevent the team from conflating this exercise with a normal design process. It’s certainly part of that process, though.
Feel empowered to use a bit of hand-waving during the interview if the prototype takes a little more imagination in some areas, too. Of course you can make this prototype using design software like Sketch , Figma , Balsamiq , XD , or whatever else you like, but beware of letting your Design Sprint prototype become something bigger than it needs to be.
Don’t get too precious about the prototype. Focus on picking a tool that will be easy to use, then use the heck out of it.
If you’re working on an iPad or iPhone app, Apple provides free iOS interface elements for Keynote. There are also lots of free UI kits for PowerPoint. You can also use images of elements you need and Frankenstein your way to a functional (read: testable) prototype.
Putting it all together
At about 3pm or so, or about 5 hours into your prototype day, try the thing out.
The prototype should be in a strong rough-draft place. Quickly put your sections together (e.g. just have each Maker play through their sections in order) so you can walk through what you have.
Walk through the full scenario and see how it looks and feels. Make note of any rough spots, then take the notes back with you as you’re round the corner on getting the prototype to a testable place.
Finally, the stitcher will take all the files and put them together into 1 whole prototype. Make sure that the interview questions line up with the prototype, and you’re ready for your interviews on Day 5.
Need to see this in action? Contact us to validate your idea with a one-week Design Sprint! 🚀